You know that feeling you get when you realize something that you HAVE TO HAVE??!! But then you realize you haven't seen it anywhere and is it even possible? Well, after researching, we found that they did exist and was possible, but it wasn't here where we are. So we contacted Natalie at The Dotted Apron about this special project we had in mind ~ and luckily for us ~ she agreed to give it a go. A few weeks later, we got the call ~ she had done it! We were extatic and couldn't wait for our samples to arrive! And just as we thought ~ absolutely perfect!!
Needless to say ~ the Pie Pops were used at last weekends wedding on the "Sweet Treats" table and were a huge hit! We could not have been more pleased with the turn out!
Instead of just showing you great pictures of the final product, Natalie, from The Dotted Apron, was kind enough to agree to be our first Guest Blogger and give you a step~by~step tutorial!
Enjoy!!!
Pie Pops, By The Dotted Apron
Step One:
Preheat your Oven to 375 degrees
Gather your ingredients and supplies ~
Favorite Pie Crust, fit for a Double Crust Pie
Favorite Pie Filling, 1 ~ 2 cups
Flour for Dusting
1 Egg
Rolling Pin
3" Cookie or Buscuit Cutter and Decorative Cookie Cutters
6" Popsicle Sticks
Parchment Paper or Baking Mat
Bun Pan
Sugar for Sprinkling
Step Two:
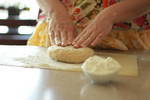
Lightly dust your work surface with flour and prepare your dough for rolling
Step Three:
Roll your pie dough 1/4" thick and, using a 3" cutter, cut rounds our of your dough
Step Four:
Place half of your cutouts on prepared baking pan. These will be your bases.
Step Five:
With the remaining half, using a round or decorative cutter, cut out pretty shapes.
These will be placed on top of your pie filling
Step Six:
Make an egg wash by separating the egg white from the yolk and adding a tablespoon of water to the white
Step Seven:
Lightly brush your pie bases with egg wash and place a popsicle stick on top of the dough
Step Eight:
Place a tablespoon of Pie Filling in the center of the pop
Step Nine:
Place a cutout on top of the filling and press lightly around the edges to seal
Step Ten:
Using the end of a stick, create a decorative edge along your pie crust
Step Eleven:
Brush each pie pop with egg wash and sprinkle with sugar
Step Twelve:
Bake pops for 18 ~ 20 minutes or until golden brown
Enjoy!


No comments:
Post a Comment